Pages

Kamis, 09 Januari 2014

How to Update Galaxy S Advance I9070 with Android 4 1 2 XXLQL Jelly Bean Official Firmware

Samsung has officially released the Android 4.1.2 Jelly Bean update with base firmware XXLQL for the Galaxy S Advance bearing model number GT-I9070.

Firmware details
PDA: I9070XXLQL
CSC: I9070ITVLQ5
MODEM: I9070ITVLQ5
Version: Android 4.1.2
Build date: Dec 05, 2013
Regions: Italy

The new official firmware is currently available as an Over-The-Air (OTA) update as well as through Samsung KIES. However, those who missed the OTA update notification or unable to access the update over Samsung KIES can download and install the same manually, using our step-by-step guide.

Pre-requisites
1. Install USB Drivers for Samsung Galaxy S Advance on the computer.
2. Enable USB Debugging Mode on the phone by navigating to Settings >> Developer Options.
3. Make a backup of all your important data before following the guide.
4. The Galaxy S Advance should be factory unlocked and not locked to any particular carrier.
5. Ensure the battery of the phone is charged more than 80 percent.
6. The Android 4.1.2 XXLQL Jelly Bean firmware is compatible only with the Samsung Galaxy S Advance (GT-I9070). Applying this to any incorrect variant might brick the device. Verify the model number of the Galaxy S Advance by navigating to Settings >> About Phone.

Files Required
1. Android 4.1.2 XXLQL Jelly Bean Firmware (Mirror Link) for Galaxy S Advance I9070
2. Odin 3.07

Steps to Update Galaxy S Advance I9070 with Android 4.1.2 XXLQL Jelly Bean Firmware
Step 1: Extract Firmware zip file using winrar/7zip/winzip or any other extracting tool, you will get a .tar.md5 file and some other files.
Step 2: Extract Odin zip file and you will get Odin3 v3.07.exe along with few other files.
Step 3: Switch off the Galaxy S Advance.
Step 4: Boot the device into Download Mode by pressing and holding Volume Down, Home and Power buttons together until a construction Android robot icon with a warning triangle appears on screen. Now press the Volume Up button to enter Download Mode.
Step 5: Run Odin on the computer as an Administrator.
Step 6: Connect the Galaxy S Advance to the computer using USB cable while it is in the Download Mode. Wait until Odin detects the device. When the device is connected successfully, the ID: COM box will turn to light blue with the COM port number. Additionally, the successful connected will be indicated by a message saying Added.

Note: If the Added message does not appear, then try re-install USB drivers or changing the port on the computer.

Step 7: Select the following files in Odin from extracted I9070XXLQL firmware folder:
  • Click the PDA button and select the .tar.md5 file.
  • Click the Phone button and select file with MODEM in its name. Ignore if there is no such file.
  • Click the CSC button and select file with CSC in its name. Ignore if there is no such file.
  • Click the PIT button and select the .pit file. Ignore if there is no such file.
    Step 8: In Odin, enable Auto Reboot and F. Reset Time checkboxes. Also, ensure the Re-Partition checkbox is chosen only if a .pit file was chosen in the previous step.
    Step 9: Verify everything suggested in Step 7 and Step 8 is done correctly. Then hit the Start button to begin the installation process.
    Step 10: Once the installation process is completed, your phone will restart and soon you will see a PASS message with green background in the left-most box at the very top of the Odin. You can now unplug the USB cable to disconnect your device from the computer.

    Samsung Galaxy S Advance I9070 should be now updated with official Android 4.1.2 XXLQL Jelly Bean. Head over to Settings >> About Phone to verify the software version running on the device.

    Note: If Galaxy S Advance I9070 stuck at booting animation after Step 10 then go to recovery mode (press and hold the Volume Up, Home and Power buttons together) and perform Wipe data/Factory Reset and Wipe Cache Partition task before selecting reboot system now function. In recovery mode use Volume keys to navigate between options and Power key to select the option. Please note, performing wiping task will erase your device internal memory data and not external SD card data.

    Click here to know How to Root Galaxy S Advance I9070 running on Android 4.1.2 Jelly Bean firmware.
    Read More..

    Rabu, 08 Januari 2014

    DOWNLOAD KRRISH 3 Game for android


    Hungama and Gameshastra, in association with Filmkraft, have launched the game Krrish 3, based on the recently released Bollywood movie with the same title. The game is available for download in India on Windows Phone, Windows, iOS and Android for free.
    Talking about Bollywood themed games, the mantra seems to have really worked for the Indian audience and Krrish 3 is certainly a notch up compared to other Bollywood movie themed games, especially in terms of visual presentation. It is an endless side scrolling runner that borrows its formula from the likes of Vector, centered around the increasingly popular art of free running. 
    However, Krrish 3 is  a kind of experience you would not want to remember for long. No wonder endless runners have earned such a bad reputation, relying on in app purchases and predictable game mechanics to mint some money. Lets find out why
    GAMEPLAY
    The game is set against the backdrop of Mumbai, where you don the role of Krrish, and as you run, youll need to swipe at the right times to jump, accelerate and evade oncoming obstacles. It seems to draw inspiration from Vector, which is all about jumping, climbing and sliding in a continuous, fluid free run.The game challenges you to outrun an opponent while collecting crystals, similar to something we saw in Subway Surfer. Youll encounter a lot of hurdles and gaps that youll need to jump across, water tower tanks that youll need to slide under and guards that you need take down or evade oncoming bullets .
    Hey Krrish!!! Catch me If you can
    You have 3 avatars that you can play as - Krrish, Kaya and Frog Man, however, the character Kaal is only available for Windows devices. You gain experience points as you play the game, for instance taking down a guard will fetch you 40 XP, overtaking an opponent will get you 30 XP and more. You also earn points if an opponent drops out in the middle of the game, which happens quite often!.
    With the experience points that you gain, you can level up and the amount of points that you need to collect with every level goes up. Levelling up will let you unlock more slots for your gadgets, power-ups allow you to speed up your character or slow down an opponent. There is only one slot available by default and to unlock the second you need to reach level 18. So, in total there are three slots over all and four gadgets to choose from.
    You start off with shurikens that you can use against your opponent if he is a few meters ahead of you, which slows him down helping you narrow the gap. You also have a freeze mine that obviously as the name suggests, freezes you opponent for a while, along with a vortex - a portal that allows you to take your character forward by a couple of meters - exclusive to Windows devices only. Finally there is a force punch which comes in handy at times. With the help of crystals collected during the game, you can buy these gadgets and equip them in the slot depending on your preference.
    The offline match is pretty difficult as your AI opponent always manages to get a headstart over you, however you need to get really used to the controls to catch up to your opponent and then deploy gadgets at the right time to get ahead of him. Sadly, the gameplay  doesnt do much to differentiate itself from other endless runners. It doesnt throw a lot at you that will keep you busy and like most endless runners, eventually loses its aura that gets wanting for more.
    ONLINE
    In a multiplayer match, you have an option of create a challenge or join one. In the quick match you are always up against someone at par with your skill levels acquired during the game. Multiplayer connectivity is really good, as you find opponents in about less than half a minute at max. This a pretty good indication of the fact that the game is quite popular in the country. However, there are a lot of ads that keep on popping up, which is something developers should definitely look into. There are also a lot of instances of lags and stutters during online play. For instance, at times during online gameplay, there are times when your opponent goes ahead of you in a matter of seconds,  then behind you then again ahead of you.
    Secondly, you cannot access the in game store when you are not connected online, which is quite strange considering the fact that you can collect crystals while playing against bots too. Even the Google Play Store reviews arent very encouraging, with users mostly complaining about lags and handset compatibility.   If we go by the amount of average crystals you earn on each run, the amount of money you earn on an average is surely going to test your patience, for which you have in-app purchases. If you are low on crystals and running out of patience which you eventually will, you can go for in-app purchases
    LEVELS
    There are three maps to choose - New City, Old City and Industrial Area - including two variants for each of them. Developers are also believed to be working on a new level which should be released soon. All levels appear nicely laid out and are challenging in their own ways.
    CONTROLS
    The game relies on all touch based controls, and all you need to do is swipe your devices touch screen in either direction i.e left, right, up and down depending what the situation demands. I reviewed the game on an Android device, and the response from the avatar was pretty fluid except for a few swipes now and then that did not work as expected.
    Yayy.. Got Him!!!
    CONCLUSION
    Krrish 3 isnt that interesting and doesnt offer anything unique in terms of gameplay, however the game does look presentable. The game probably will be able to market itself as a Hrithik Roshan game, which could possibly be the only way to get attention. If you enjoy being entertained by Hrithik Roshan in his Krrish avatar jumping around everywhere, you should check this out. The only reason it manages a score of 3 is because it will certainly appeal to a particular demographic.  Apart from this, Krrish 3 doesnt have the elements that other popular endless runners have that would want you coming back for more.

    Read More..

    Selasa, 07 Januari 2014

    Download Roll A Joint APK Latest Update

    Today, I will post the unique application from play store, named Roll A Joint this apps is one of wonderful Android phone app for smokers. Maybe you are looking for or have found a unique Android app wants to try what is in it. Roll A Joint app that you can get at the cost of $ 1.99. although Im sure you can figure out how to get it for free if you know the right sources.


    Roll A Joint apk actually lets you roll your own joints on your phone. It takes your through the process of rolling and smoking your own virtual joint and they have just released and update that will let you roll blunts, which of course as well a know are rolled in different fashion.

    Roll A Joint apk takes your through the method of rolling and smoking the virtual pivot, that have simply been published and might update the roll blunts, that in fact additionally understand one, wrapped in a very totally different way.

    Once you have broken all of it up into small pieces you are then instructed to put all of the bud in the outlined rectangle of the paper. From here you roll the bottom, roll the top and twist the ends shut. The instructions tell you to inhale on the microphone of your device and press on the screen where a lighter will appear. 

    Once the lighter appears and you have lit the joint you can release your finger from the screen and blow out onto the microphone to see the smoke. Once the joint is finished and goes out you can roll another one.

    It is a great simple app, but I think there is plenty of room improvement. First of all, the smoking does get you quite light headed because you have to suck in so much and blow out so much. It works good, but the amount of time per inhale and exhale causes you to become light headed, but displays a great show of smoke rings and baking out your phone.

    Overall, this is a novelty app for rolling and smoking a joint. At the time of this review the Roll A Joint Android App is $1.99.

    If yopu want to instal this app, you must buy the original apps from play store via this link, please support the developer by buying this apps. But if you want to get this apps free, you can follow the link below

    Download Roll A Joint APK Newest version
    Read More..

    Senin, 06 Januari 2014

    Download Gamecih APK full latest Version 3 0 0

    Download gamecih v 3.0.0 APK - Playing a game in Android is very fun, but if you are stuck in a level because you have to meet a minimum requirement in strength, or you have to buy some expensive equipment, it is very annoying and some time you will feel bored because you have to collect money to buy the equipment. the best solution is using gamecih apk for android.


    Back in the older console day it was always fun to use cheat engines or things like Game Shark to play games with unlimited money, unlimited health or all the levels unlocked along with many many other cheats. Now there is something similar on Android called GameCIH apk.

    GameCIH APK allows you to modify variables of any program you are running. Because of this power many gamer uses this program to increase their score, coins, gold coins, high score, money, level, HP and so on. Only requirement to this simple  yet powerful program is you need to be rooted. The reason you can guess is Android doesnt allow one program to modify other programs value directly.

    To use GameCIH you will need to be on a rooted device, otherwise it will not work. With that said, here is the quick tutorial on how to use it that b02 posted. This is taking into account you are already rooted:

    1. If you dont know what is root, or dont know how to root, you are on the wrong thread. Come back after exploring xda 
    2. Download the version that you wish to use, i use older one, the reason i did that is because i didnt need the latest features of GameCIH.(about features read changelogs on gamecih site)
    3. Install it, and open, put it on your phone memory, and give it root access.
    4. When you open it, assign a key (i use VOLUME DOWN), dont exit it just use home so you can continue(for exit use menu exit).
    5. Open a game that you wish to cheat in. I personally tried it on Defenders game..
    6. Start playing the level, and pause it after taking a note how much gold/crystals/stars or anything you have.
    7. Press Volume down, Input number, and write amount of gold that you have. It will list a lot of numbers and stuff, 1 of them is our gold .
    8. Press back, resume game, continue playing, kill some monsters, earn some gold, then pause again and input the new amount of gold that you have. Now it should list a single number beneath.If not repeat this step.
    9. Press on that number, modify it to amout that you want, after pressing okay, you will have the gold you typed in...
    10. Now you can go spend what you hardly earned with cheating the game. 
    Or you can watch the video below for tutorial how to use gameCIH APK for android :


    Download Gamecih APK v 3.0.0 from the link below :

    Download Gamecih APK full latest Version 3.0.0

    Read More..

    Minggu, 05 Januari 2014

    PhotoSpeak 3D Talking Photo free apps for android


    PhotoSpeak 3D Talking Photo  is the best apps for android . This apps is excellent . when you use this apps must be enjoy that . A photo  talk with  you . this is the unbelieved apps . this apps free for android .

    How to install:

     1. click PhotoSpeak 3D Talking Photo file you can see install & click install . 


    2. click OK button 

     
    3. You can see this interface .


    4. End the installing than OPEN button . 


    How to use it :


     5. Open this apps see this interface than click camera button . 


    6. Than came to this interface & click Photo Gallery option  , select your photo from Gallery . 


    7 . when you was select a photo you can same interface . i draw   this picture you setting as your like . 


    Download Apps 


    Read More..

    Sabtu, 04 Januari 2014

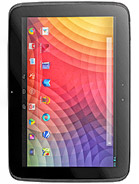
    How to Root Nexus 10 on Android 4 2 2 Jelly Bean Firmware

    The Nexus 10 is a tablet computer developed by Google and Samsung Electronics. It is the second tablet in the Google Nexus series, a line of consumer devices implementing the Android operating system and built by original equipment manufacturer (OEM) partners.

    Nexus 10 users who have already installed their devices with Android 4.2.2 Jelly Bean, may root their devices using the tutorial below.

    This tutorial uses CF-Auto-Root file released by recognised XDA Developers, Chainfire. The CF-Auto-Root file allowing Nexus 10 users to root their devices easily without depending on the firmware. It completely supports Android 4.2.2 Jelly Bean and future firmware as well. Head over to the CF-Auto-Root main thread to learn more about the root method.

    Disclaimer: Rooting voids the warranty of your device. We and the developer of this rooting procedures shall not be held responsible if any undesirable outcomes may happen to your device. use of this root guide is solely at your own risk!

    Pre-requisites
    1. Make a backup of all your important data before following the guide.
    2. Enable USB Debugging Mode on the phone.
    3. The Nexus 10 should be factory unlocked and not locked to any particular carrier.
    4. Ensure the battery of the phone is charged more than 80 per cent.
    5. The CF-Auto-Root file works only on Nexus 10. Applying this on any incorrect variant might brick the device. Verify the model number of the Nexus 10 by navigating to Settings >> About Phone.

    File Required
    1. Android SDK
    2. CF-Auto-Root for Nexus 10 (CF-Auto-Root-manta-mantaray-nexus10.zip)

    Steps to Root Nexus 10 on Android 4.2.2 Jelly Bean Firmware
    Step 1: Install the Android SDK. The package includes the necessary drivers for connecting your Nexus phone to the computer, which is mandatory for the rooting process.
    Step 2: Extract CF-Auto-Root file using winrar/7zip/winzip or any other extracting tool.
    Step 3: Switch off the Nexus 10. Then boot the device into fastboot mode by pressing and holding Vol Up + Vol Down + Power buttons together.
    Step 4: Connect the Nexus 10 to the computer using USB cable, then wait until Windows finished installing the drivers.
    Step 5: Navigate to the folder where you extracted the CF-Auto-Root files, then run the following command:
    • Windows: Run root-windows.bat
    • Linux: chmod +x root-linux.sh, Run root-linux.sh
    • Mac OS X: chmod +x root-mac.sh, Run root-mac.sh
    Step 6: Follow the on-screen instructions. Once the rooting procedure completes, the phone will boot into normal mode. You can now unplug the USB cable to disconnect your device from computer.

    Nexus 10 running on Android 4.2.2 Jelly Bean firmware is now rooted successfully. Open the app drawer of the Nexus 10 and look for an app called SuperSU. Verify the root status of the device by downloading Root Checker app from Google Play Store.

    Note: If SuperSU does not appear, then you can install it manually from the Google Play Store.

    Thanks to all fellas at XDA who first tried out this rooting technique. This method was originally posted via XDA-Developers original thread.
    Read More..

    Jumat, 03 Januari 2014

    Androids some important security code

    Theres a lot of secret codes for android phone, which we do not know it. you use this code, you can change the settings of your Android phone . Lets assume that some of the secret code


    *#06# –  IMEI numbers will be displayed

    *2767*3855# –   Factory reset code (Loss all data in mobile )

    *#*#4636#*#* -- Phone and battery information

    *#*#273282*255*663282*#*#* - All media files are backed up to code.

    *#*#197328640#*#* –  Service Test mode code.

    *#*#1111#*#* –  FTA software version

    *#*#1234#*#* –  PDA and firmware version.

    *#*#232339#*#* –  Wireless LAN test code.

    *#*#0842#*#* –  Vibrate test code and taillights.  

    *#12580*369# -  Software and Hardware Information.

    *#*#2664#*#* –  Test code for the touch screen.

    *#9900# –  System dump code .

    *#9090# – Diagnostic configuration 

    *#*#34971539#*#* –  Camera Information. 

    *#872564# – USB login  control.

    *#301279# –  HSDPA / HSUPA Control Menu.

    *#7465625# –  Phone lock status.

    *#*#7780#*#*   –  Factory re - store settings. The system will delete all data including the Google account.

    *2767*3855#   –   Factory settings format. All internal and external data can be deleted and re firmware - will be installed.

    *#*#34971539#*#*    -  Camera Information. Do not use the option to update the camera firmware. The functions of your camera will be closed.

    *#*#8255#*#*  -  G Talk service monitor code.

    *#*#7594#*#*   –   This code calls your inda / Power button is becoming a Direct Power Off button.

    *#*#197328640#*#*    -  Service mode code. Changing the settings for a variety of test and.       


    Read More..